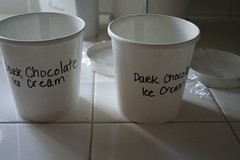
Thursday, November 20, 2008

Green Tea Ice Cream

IMG_8440
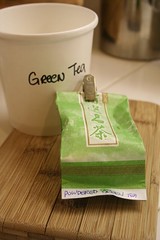
Thanks to my co-worker Joy from work, I got to work with some really good Green Tea Macha Powder for my next experiment, Green Tea Ice Cream. Yuuuum-e!
IMG_8456
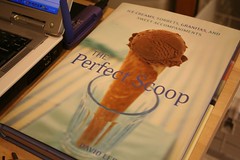
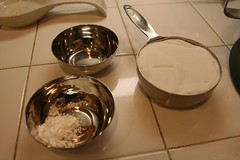
The powder came in a very tiny tiny bag - I thought for a second that I'd need to use the whole thing! But I only needed a mere 4 teaspoons according to my ice cream bible that is The Perfect Scoop. =)
IMG_8449IMG_8451
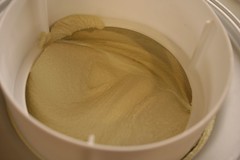
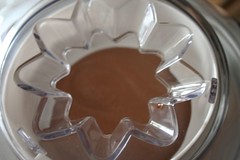
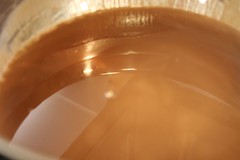
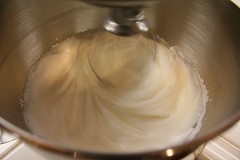
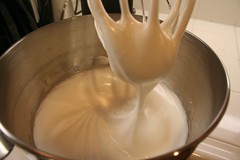
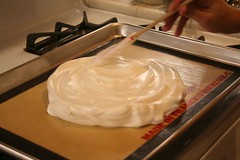
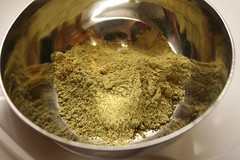
As you can see, the powder was a very rich green. However, when combined with the cream - the color wasn't exactly what I was expecting. Then again, that might be good. Sometimes REALLY GREEN foods aren't the most appetizing things.
IMG_8454
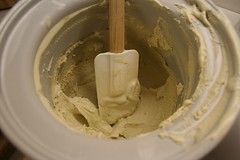
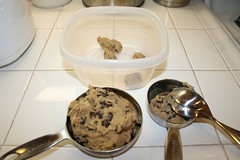
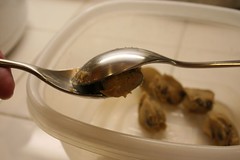
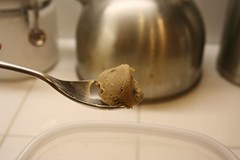
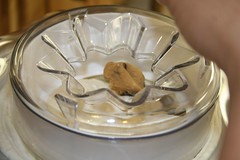
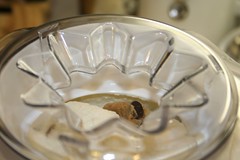
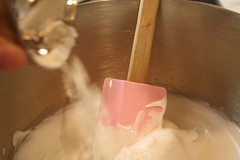
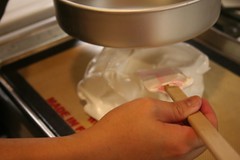
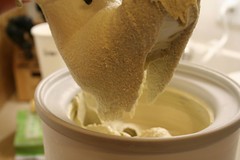
After having a couple tries at this ice cream making thing, there's one part of the process that I've come to despise. And that part is getting that last bit of ice cream out of the bowl. Do amateur home ice cream makers know what I'm talking about? I'm talking about the ice cream that has frozen to the sides of the bowl making it impossible to remove without a very very stiff spatula! it's not like you can take a metal spoon to this thing so this part is very tasking, especially when the bowl is FREEZING COLD!
IMG_8455
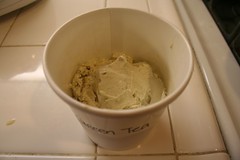
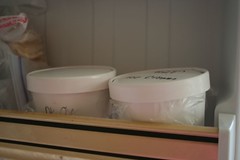
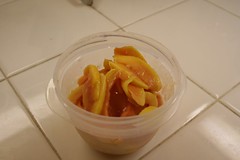
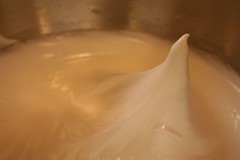
Anyway - it was worth it - green tea sweet creamy goodness was now packaged and ready for me to eat anytime. As always, I tested this out on my co-workers and got a few responses back. Some thought it was a bit rich for their liking; I probably could cut back on some of the egg yolks used in this recipe. Another thought the after taste was interesting; maybe a bit more sugar could tame that after taste but I don't know. I'd have to try it again sometime to see.

But all in all - it wasn't bad and I had a bit of an addiction to it in the afternoon surprisingly. Another experiment down...still trying to get to that Malt Ice Cream! arggggg...

Wednesday, November 19, 2008

Cookie Dough Ice Cream

IMG_8436
It was finally time to make something for my dear husband, poor guy. He had to wait this long for me to make something for him! He should've been the first recipient of all this ice creamy goodness but his request was not one for the first timer - or so I thought. Searching the Internet, I happened on this recipe. A recipe for imitating Ben & Jerry's Chocolate Chip Cookie Dough Ice Cream.
IMG_8414
This recipe had the usual base and so starting this recipe turned out not to be so bad at all. So I heated up the cream and eggs, etc. as usual on the burner and set aside the egg yolks and sugar for beating in my mixer.
IMG_8408IMG_8412
While the cream was heating up, I started work on the cookie dough. Rather than make the dough myself (which I seriously thought to do so that I could like the bowl) I caved into my laziness and bought a tub of none other than Nestle Toll House Cookie dough from the market.
IMG_8403IMG_8395
I measured out a cup and a half and then...
IMG_8398IMG_8400
...proceeded to make little quinels of cookie dough.
IMG_8401
BIG MISTAKE! These quinels, though small as they may seem right now, later turned out to be HUGE in the container. It made for very very tough scooping of the ice cream since that dough is very hard to cut through with a spoon when frozen - especially a plastic spoon!
IMG_8419
Anyway, I digress. After putting the basic base into the bowl, you let that thing run and don't add the cookie dough in until 5 minutes before it's done.
IMG_8429IMG_8430
This, we also would do differently only to get a better distribution of cookie dough in the ice cream. My husband suggested that I don't add the cookie dough into the machine, but to layer the ice cream and the cookie dough manually when putting the the ice cream into the containers. I think I will try that next time...with SMALLER PIECES! I'm telling you, the cookie dough bites were huge. Despite, things came out great and even the co-workers loved it...after having to break through a few plastic spoons that is. =)

Wednesday, November 12, 2008

Click on this!

Now THIS WOMAN knows what to do with left over egg whites from ice cream making! Thanks J for the link!

Monday, November 10, 2008

I *heart* ...

Ohhh...can't wait to make an Ice Cream outta this!

my ice cream maker is calling out to me...

Sunday, November 09, 2008

Homegrown

IMG_8139
"Farmer's Market" Joan from work so generously gave me a couple lettuce plants as an experiment. She grows a couple lettuce varieties in her backyard and wondered how they'd do in pots.
IMG_8140IMG_8141
Me and another co-worker of mine from work were interested in planting some winter veggies and lettuce. However, we didn't have the ground space to do it and so Joan brought in a couple plants in pots for us to take home and experiment with.
IMG_8153
And man, I feel this much closer to Thomas Keller. Okay - a BIG stretch, but I am now eating salad made with lettuce leaves that came from my own back patio! I was so excited to eat my first homegrown salad - so much so, I JUST HAD to take pictures, hehe. (okay, a lot of pictures...who takes pictures of spinning salad?!)
Time for a spinnin'
Anyway - the salad turned out beautiful and we ate the fresh lettuce with a quick olive oil and red wine vinegar dressing. Wish I had bought some sweet red onions to go along with it...sorry Jaime Oliver, I have failed you. But it was great none the less. Fresh is best and it's just plain fun.
Beatitful!

Saturday, November 08, 2008

Lotus Root Tempura

Mmm, Mmm, Mmm! I had fried Lotus Root when I did a chef's tasting at Maison Akira in Pasadena and was hooked! So the next time I visited Marukai for my once a month shopping spree - I picked up a vaccummed sealed bag of pre-sliced lotus root from the veggie section thinking I'd give it a try. (and giving ice cream a break for a while)
Raw pre-sliced Lotus Root
Now 'Fear of Fear itself' is a very strong thing. Because I had never worked with lotus root before (it's a strange looking root thing with holes in in when you slice it cross-section) I was intimidated by it. I was afraid I'd mess it up or it was one of those things that would taste horrible when not done exactly right. I was afraid of the unknown...but since my ice cream kick (no, I did NOT make lotus root ice cream)...I had renewed confidence in experimentation and thought I'd give the lotus root a go. (And of course, my husband would kill me if I threw another bag of food out because I didn't get around to using it - we're all about using/eating EVERYTHING and I get really depressed when I don't use something.)
Tempura batter
So - the idea of lotus root tempura came to mind and the fear intensified. I'd never made a tempura batter before either! In desperation, I called my mom and my sister on the way home to ask them how to make it - they gave me a few tips but they could not recant the whole recipe. So out with the laptop again in the kitchen and googled 'Tempura Batter'. Not too bad really - with ice bath experience gained from ice cream making, making the tempura batter in an ice bath was a sinch. In not time I had batter and oil hot on the stove...I was ready.
Lotus Root Deep Fry
I heard about using Peanut Oil for deep frying and thought maybe this would be a good spot to use it since it may lend some additional flavor to the root since roots really don't have too much flavor (i.e. Daikon). Plus, I didn't have anymore Canola Oil and I'm glad I ran out! Because the lotus root turned out great! Mind you, lotus root will give you more texture than taste so to bring out the flavor, sprinkle generously with flaked sea salt and if you really like salt, some regular spiced sea salt. I used a sea salt that I got as a gift. One of my high school friends runs an online spice shop in Hawaii with his wife, how cool!
Finished product
Anyway - it turned out great and it's kind of like eating chips but not. The lotus root is crunchy and you can just keep eating these till they are all gone. My husband was very weary when he saw them at first and then he ended up eating half of the bowl with dinner. Hey - anything that tastes remotely like a chip that can give me a dose of vegetable is awesome in my book.
Lotus Root Closeup - Yum
"Fear of fear itself"...no more! At least not with Lotus Root and Tempura, haha.

Friday, November 07, 2008

The Perfect Scoop - Dark Chocolate

For my second ice cream experiment...I give you the cover of The Perfect Scoop, Dark Chocolate Ice Cream!
My new book
A girlfriend at work loves chocolate...and I mean LOVES chocolate. Her chocolate obsession is at odds with her love of healthier foods. One perfect example is a story she recants about eating Skinny Cow Chocolate Ice Cream sandwiches alongside a heaping spoonful of peanut butter, and I mean ON the spoon. With the ice cream sandwich in one hand and the spoon in the other, she'll take a bite out of the chocolate skinny cow sandwich and then a lick of the peanut butter; savor, swallow, repeat. Ah - it's the simple things in life y'know?
Nifty containers from Smart & Final! AWESOME!
So, after my first experiment on my co-workers of my first ice cream, Passion Fruit w/ Macadamia Nuts, I decided to indulge in my co-worker's chocolate obsession and make The Perfect Scoop's Dark Chocolate Ice Cream. I had some Penzey's Dutch Natural Process Cocoa Powder and bittersweet chocolate in the cupboard and a pint of whipping cream in the fridge. I was contemplating running to the store to buy the heavy whipping cream, but got lazy and decided if I was going to finish this tonight that I better start it now!
The making of the Dark Chocolate Ice CreamDark Chocolate Ice Cream setting
I was worried; I thought that substituting whipping cream for heavy whipping cream in this particular recipe was an absolute no-no. But thank goodness, it came out alright. I thought it could have been darker tasting - I think my bittersweet chocolate wasn't exactly 70% - don't know, it didn't say on the packaging. However, my co-workers thought differently. So much so that the container somehow disappeared when I wasn't looking. They all loved it and so did my chocolate obsessed friend who is probably going to kill me if I bring in another ice cream before next week. I gotta pace the experiments or they're all going to hate me for contributing to the normal winter weight gain. But I can't help it! I feel like an evil ice cream mad scientist!!! And the freezer is starting to fill up with my mad experiments. Next experiment...Cookie Dough for the hubby.
Ice Cream StockpileIce Cream Stockpile!

Thursday, November 06, 2008

Crazy about guava and passion fruit

Back to when my pavlova had cooled, is was time to top it with good stuff.
IMG_8281
Unfortunately, I had to assemble the pavlova with toppings at work (where we can't take pictures) so you won't get to see the finished product here but here's what I did...

Guava SlicesFreshly sliced guava
A co-worker from work (not Joan this time surprisingly) brought in fresh picked guavas! Whoah! They were so fragrant, they smelled up the whole office! (In a good way. Well, at least to me.) So I took a couple home, peeled the fruit and removed the seeds then sliced the guava really really thin. Then I made a stabilized whipped cream adding more of the passion fruit compound I had on hand. Various recipes said to add a Tablespoon of flavoring...in retrospect, I would've added a little more since the flavor was very light, almost not noticeable. I had planned to bring extra Passion Fruit compound for drizzling.
Passion Fruit Whipped Cream toppingPassion Fruit Compound for drizzling
So, I'm really sorry, but you'll just have to imagine Pavlova + Passion Fruit Whipped Cream + Freshly Sliced Guava all drizzled with Passion Fruit Sauce...Oh - it was so good. The tangyness of the guava and passion fruit flavors cut through the sweetness of the pavlova quite nicely. Another success and pretty easy to do. Kiwi as a topping would work well also. Yum yum yum!

Wednesday, November 05, 2008

What do you do with left over egg whites?

You make PAVLOVA!

Searching for Pavlova recipeFound a good one!

I LOVE using this sugar given to me by justjenn as a present. It's awesome and perfect for the Pavlova!

Baker's Sugar

Trusty stand mixer and ingredients at the ready!

The setupIngredients at the ready

Whipped egg whites progression:

(Whisk on low till bubbles appear)
Whisk till bubbles appear
(Add sugar and whisk at medium till soft peak stage)
Adding the sugarSoft Peak?
(turn to high speed and whip to stiff peaks)
Stiff peak?Stiff peak?

Adding the cornstarch and vinegar:

Vinegar

My measuring tool in lieu of a circle drawn on parchment:

My measuring tool in lieu of a circle drawn on parchmentUsing my 8" pie pan as a measuring tool

Into the oven for an hour and fifteen. Then turn oven off and leave pavlova in the oven OVERNIGHT with oven door ajar, now THAT I like! No storage issues until morning. =)

Well, here we go into the oven...

The finished product. My first Pavlova! Crispy outside and Marshmallowy inside, YUM!

My first PavlovaCloseup of marshmallowy inside

Cooled and covered, this Pavlova will last another couple days...but for best results, eat sooner! (I won't be serving this for another day or so...so toppings in a later post.)